Christmas Cookies
I loooove blogs with beautiful pictures of food and yummy recipes...
(Favorite: The Pioneer Woman Cooks )
sometimes I try to be like them...
this is going to be one of those times :)
You'll want to make these. Trust me.
Start with 1 3/4 cups flour whisked with 1/2 cup unsweetened cocoa powder and 1/4 tsp salt.
In a separate bowl, using an electric mixer beat 3/4 cup unsalted butter at room temperature with 1 cup of sugar.
Once the sugar and butter is well blended, beat in one large egg.
Add the dry ingredients and beat until blended.
Refrigerate the dough for one hour.
Now is the time to open a bottle of wine and kick you feet up and just relax.
Oh wait... that was my dream, nevermind... back to reality! ;)
After your (perhaps relaxing if you don't have kids) hour is up, preheat your oven to 350 degrees and start making tablespoon-sized balls of the dough.
The recipe calls for parchment paper on baking sheets, but I just used my Roul Pat, it worked great.
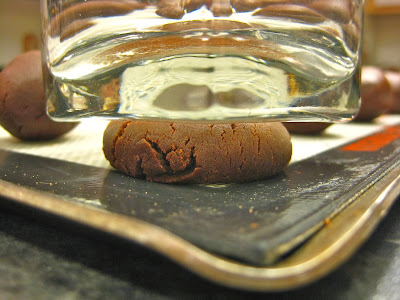
Next take the bottom of a glass and start smushin!
Flatten each ball into 2 inch rounds.
Its ok, the edges will crack... which is difficult to accept for a perfectionist like me!
Bake at 350 degrees for 10-11 minutes,
or just until they are no longer wet... do not overbake!!!
Let the cookies cool for 5 minutes on pan, and then cool them completely on a rack.
Do try to fight temptation and not eat one before the best part comes!!!
While the cookies are cooling you can start making the yummy buttercream filling.
Start by using an electric mixer to blend 1 cup plus 2 tablespoons of powdered sugar with 3/4 cups unsalted butter at room temperature.
Beware, the powdered sugar is going to fly all over your counter!!!!!!!!
After that is well blended, add 3/4 teaspoon of peppermint extract and 2-3 drops of red food coloring.
Be sure to let the kiddos lick the beaters on this one :)
Next place 2 generous teaspoons of the filling on the flat side of half your cookies.
Here is how I did it, to make sure I didn't frost too many:
Next put the cookies together!!!
And smush them hard enough so some of the filling comes outside the edges...
you'll see why soon...
Take some candy canes (I used 10 little ones, probably would've been fine with 9),
and smash 'em!
(p.s. You can tell my lighting got worse toward the end of these pictures... apparently I don't have the best lighting in my kitchen after sunset. And yes this was pretty much an all-day event for me!)
Roll the edges in the smashed candy canes and voila!
Enjoy your Chocolate Candy Cane Cookies :)
From Amy Jo's Kitchen, and epicurious.com


No comments:
Post a Comment